Are you planning to start a WordPress blog on Bluehost that will make money in 2022? If yes, you landed in the right place. In this post, I will discuss how to get Bluehost web hosting at an affordable price and how to install WordPress on Bluehost servers within 5 minutes and earn money from that blog.
Blogging has become one of the most popular ways to share information and ideas on the internet. Bloggers can use their blogs for business growth and career growth, sharing their thoughts and expertise with people worldwide. There are many benefits to blogging, including increased visibility and credibility, an opportunity to network and find new clients, and marketing potential for businesses.
Table of Contents
If you install WordPress locally on your computer, it won’t be available for others to see on the internet.
But before starting a blog, you should answer some critical questions:
- What are your goals?
- What topics will you cover?
- Who is your audience?
- What is your budget for advertising? And
- How much will you need to invest in online tools?
So, if you’ve been thinking about starting your blog, let this blog post give you insight into how to get started.
Why I Choose Bluehost to Start A New Blog in 2022?
Starting a blog can be incredibly intimidating. There are so many new things to think about, and it can feel like there is no end to the research you need to do. But don’t worry! Bluehost is here for you.
Bluehost is an officially recommended WordPress hosting provider by the WordPress team and one of the largest hosting companies in the world
The web hosting team takes care of everything from the technical side of things, so all you have to worry about is your content.
Here are some of the most important reasons why people choose Bluehost when they’re starting their blog: –
- They offer unbeatable customer support team that will help get your blog set up quickly and efficiently.
- They provide every tool necessary to run a successful website (including built-in spam protection)
- They’re one of the most affordable options on the market – They offer a variety.
- Many hosts will lure you in with the promise of cheap rates and plenty of bandwidth, but they won’t tell you about their hidden fees or terrible support. It is why we recommend Bluehost for starting your new blog.
- It offer free migration facility to migrate any wordpress site from other hosting to bluehost. Most wordpress sites will be eligible for the free migration.
- They offer transparent pricing and excellent customer service.
- They are so confident in the quality of their service that they offer a 30-day money-back guarantee (even if you don’t use it!).
- It is the WordPress recommended hosting company for a long time.
Bluehost is the best option for new bloggers. Bluehost has everything that new bloggers need to create a successful blog, from unlimited domain hosting to an easy-to-use dashboard.
When you start your search for a web host, one of the first things you’ll notice is the wide range of options. There are both free and paid services out there, but which one should you sign up for? To answer this question, we’ll look at what’s available and how it will apply to beginners. We’ll also compare Bluehost to other popular hosting services so that you can learn more about which one might be best for you. you can read the Bluehost review for more details.
Simply, everybody should have their own website, and Bluehost is the best way to go!
Here are the key features of Bluehost Hosting plans
- Free domain name for the first year
- Bluehost offers quality free migration
- Free SSD drives for all shared hosting plans
- Unlimited site traffic with more storage space
- unlimited resources like bandwidth and storage
- eHTTPS/2, NGINX caching and PHP8
- Easy WordPress installation process on their newly integrated BlueRock cpanel dashboard
- Free SSL certificate from Let’s Encrypt
- Free Cloudflare CDN
Why should I use WordPress?
WordPress is one of the most popular content management systems in the world today. It is the most accessible tool to create, edit, manage, store and distribute a website. It works on many platforms, including Windows, Linux, and Mac. It is the most widely used content management system that supports customization and content on every web page. WordPress is known for its advanced tools that make writing a blog or website simple. It allows you to use themes and plugins. WordPress has emerged as one of the strongest and highly used site-building platforms (Website builder) with the vast blogging and content management features it offers. The latest version of WordPress is 5.8.
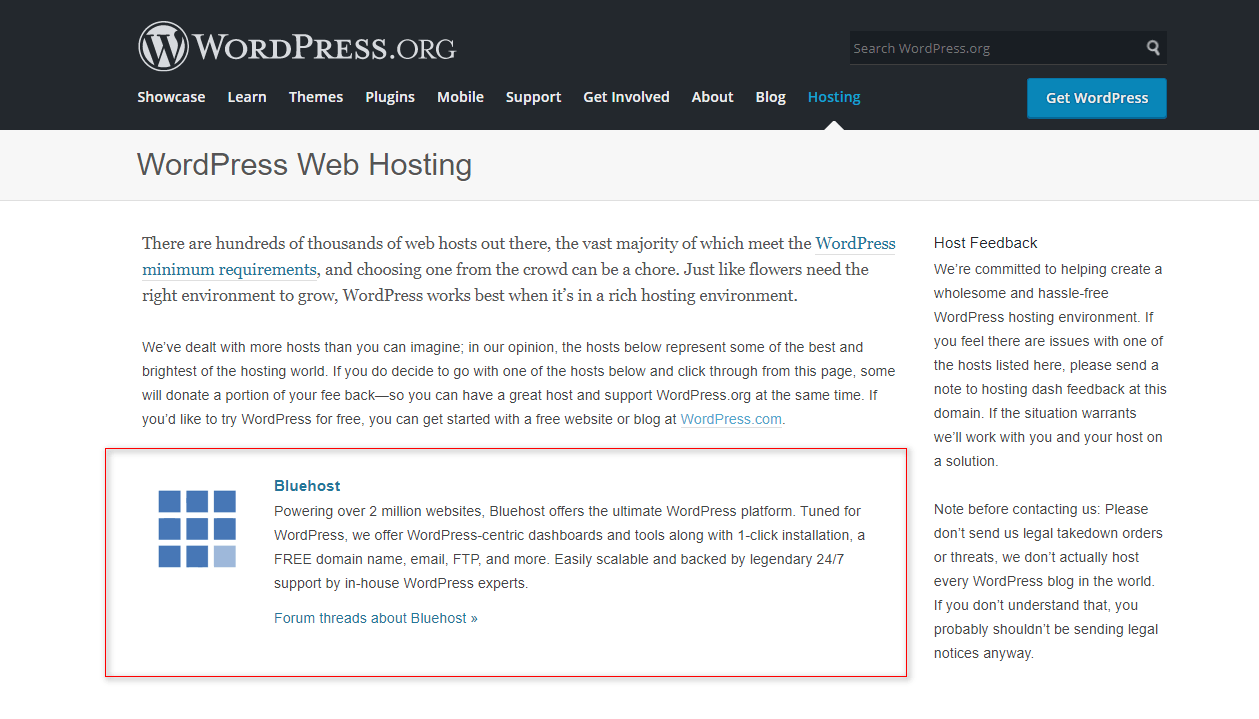
How to Signup with Bluehost web hosting?
Now, if you are ready to start a new blog on Bluehost, let us know a few points before you begin these detailed steps to create the first blog on Bluehost managed WordPress hosting. They are
- Decide on a new domain name to grab the free domain name feature from Bluehost for the first year. It should be readable and easy to notice. But do not use special characters and numbers in the new domain name.
- There are two Bluehost services. Bluehost USA and Bluehost India. To buy the web server from Bluehost USA, you need a credit card to pay your hosting charges. If you are ready to buy from Bluehost INDIA, you can pay the hosting costs through local payment systems like net banking, UPI, Rupay, Digital wallets, and Amex, along with Credit card payment.
- Choose the best premium WordPress theme to make your website load fast. Bluehost has a fantastic collection of premium themes, and you can access those themes from your wordWordPresshboard after installing wordWordPressthe Bluehost server later. If you are interested to know these premium themes, you can read my article on Best Fast loading WordPress themes list.
These three are mandatory before you start the setup process on a self-hosted website in Bluehost. Once you purchase hosting and a free domain name from the Bluehost, it will start installing WordPress for you.
Now let us follow the easy steps to start the installation of the WordPress website
Step 1: Start Buying from Bluehost.com
The first step is to start setting up a new web hosting account to start a blog with the Bluehost website. By default, they offer a 66% discount on their official page.
Activate Bluehost Special Discount – $2.65/MonthIf you go through this link, you can activate a special discounted price of $2.45 per month. Then simply click on Get Started.

Most of the Bluehost web hosting plans are suitable for WordPress users because their servers are updated with the latest PHP and additional tools and server-side optimization.
Step 2: Pick the best Bluehost Plan.
After clicking on choose plan, the offer page will redirect to the Bluehost Plans and prices. Here you will find the three different plans. Bluehost offers three other WordPress shared hosting plans. They are Basic, Plus, Choice Plus and Pro plans.
I recommend the Choice Plus plan because of its unlimited domain hosting feature. When compared with the Basic plan, the pricing of the ChoiceChoice plus is not high. So choose the Choice pls is the perfect ChoiceChoice in this.

Let us see the details of Bluehost shared hosting plans.
- Bluehost Basic Plan: It is an excellent choice to start with a single site at $2.95/Month.
- Bluehost Plus Plan: This is a recommended plan to host unlimited websites in one place at $5.45 per Month.
- Bluehost Choice Plus Plan: It comes with a code guard, free domain privacy and free automatic backup features for the Plus plan pricing. I recommend this plan over Bluehost plus plan for additional benefits at $5.45 per Month.
- Bluehost Pro Plan: This plan comes with all three plans and free dedicated IP at $9.50 per Month.
For beginners, the Basic plan is perfect. It is the cheapest Bluehost shared hosting plan to start a new blog in 2022. If you are already running blogs, go for the ChoiceChoice plus plan for more additional benefits than a Plus plan.
Now choose the plan, then click on SELECT.
Step 3: Claim Bluehost Free Domain
After choosing the suitable plan by clicking on the SELECT, you will go to the screen to claim the Bluehost free domain offer. Here you will find two options to choose from. If you already have the purchased domain name, you can choose to use a domain you own, change the DNS settings, or add the Bluehost Nameservers at your third party domain registrars like Godaddy or Namecheap point your purchased domain name to the hosting.

If you do not have any domain name or are new to starting a new blog, you can do some research to finalize the proper domain name. Then enter your chosen domain name in the domain search of the Create a new domain section to claim the Bluehost free domain and hit the NEXT button to check domain availability.. Bluehost will show the list of available domain name extensions and similar domain names for you. You can take this advantage to claim the free domain name from Bluehost.
Step 4: Add Account information
After setting up the Domain name, you will be redirected to the next screen. Here, Bluehost will ask for your details to create your new account. You have to add details like name, address, active email address and phone number for the registration purpose in the required fields. Provide complete and accurate information in the registration form to get all hosting-related details and Cpanel login details to your email address, which is entered here.
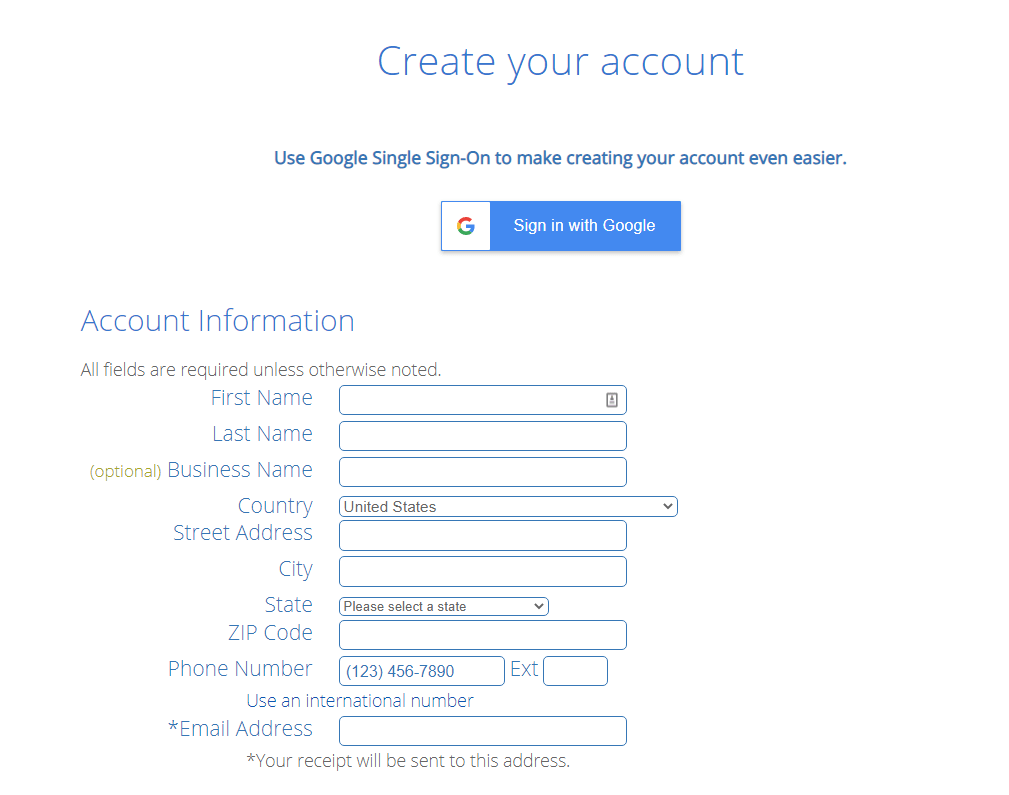
If you feel this is a time-consuming process, you can use the option Sign in with Google to speed up your process.
Step 5: Choose a big plan for maximum discount
After filling in the account information, you need to choose and confirm the plan details. Better to choose a 36 monthly plan to avoid high renewal charges every year. Because Bluehost offers huge discounts on new accounts only, they do not provide any discounts on the renewal charges after completing your hosting plan period.

Tip: to get more than 70% discount than the regular 66%, move your cursor out of this page. You will get a popup with a 70% discount. Just Claim the savings to save some more money than regular discounts.

Step 6: Untick Bluehost Extra addons
In this section, you have to check them carefully. Because the Bluehost will add a few of the premium package extras by default, It may be
- Domain Privacy protection – $11.88 per year ($0.99 Per Month)
- SiteLock security – $23.88 per year (billed annually at $35.88 per year)
- CodeGuard Basic – $2.99 per Month (billed annually at $35.88 per year)
- Bluehost SEO tools – $23.88 per year ($1.99 Per Month)
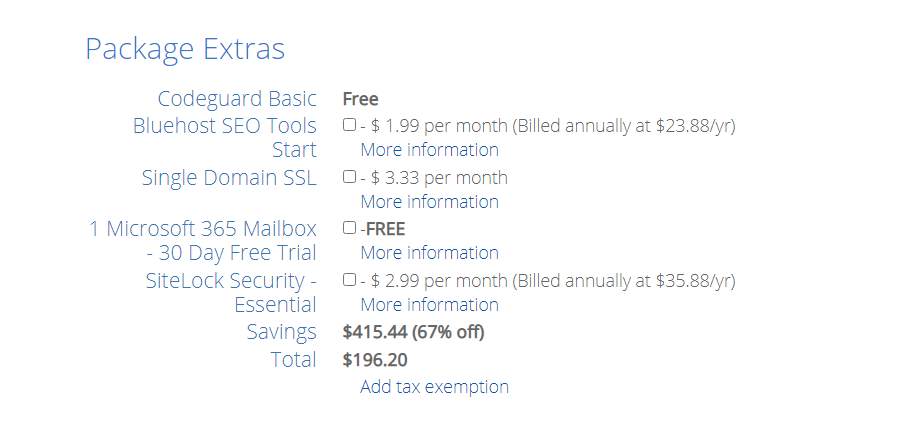
You can de-selecting these addons from this page. If you need these services, you can add them later. Now check the package information to confirm the maximum discount that you are getting in this plan.
If you choose the ChoiceChoice plus plan, Domain privacy and Codeguard addons will come within hosting charges. There is no extra cost to you. But the Choice plus renewal changes are significant. So this is your time to make a good decision before choosing the perfect Bluehost plan.
Step 7: Choose and Add Payment details
It is the last step of the Bluehost signup process. In this step, you need a credit card to complete the payment process. If you don’t have a credit card, you can get help from your friends who have credit cards.
If you are taking a Bluehost account from Bluehost INDIA, they provide additional options like net banking and UPI. You can use any one of the payment systems to complete this purchase.

Now you have to enter the payment details by providing the credit card information like credit card number, CVV code, and Expiry date, then simply click on the Submit button to complete. Before hit this button, you have to agree with the Bluehost terms and conditions by placing the tick mark before submitting the button.
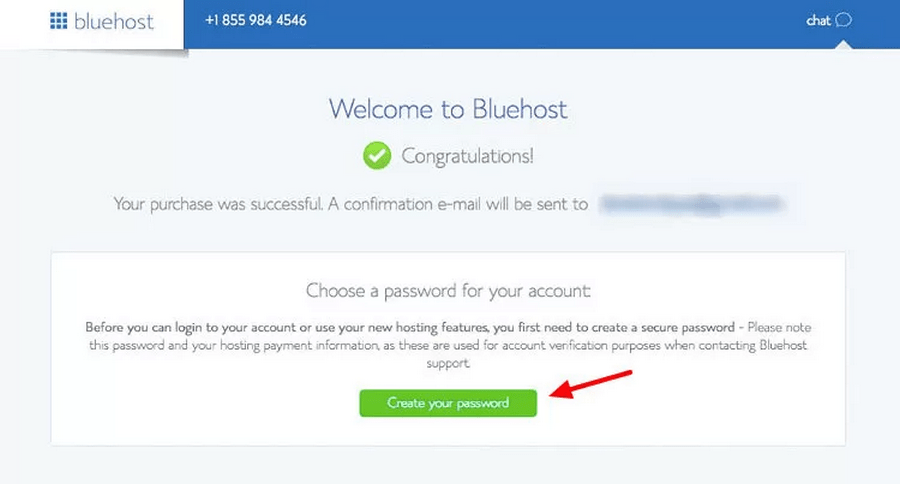
After a few seconds, you will get the confirmation email with your billed invoice to the registered email address along with the Password setting page link.
The Bluehost comes with a 30-day money-back guarantee policy. You can request your money at any time within 30 days of the purchase.
Step 8: Create a new Bluehost account with a new password
After complete email confirmation, you will be redirected to Bluehost Welcome screen with a new password setup option. Now it is time to create a strong password for your Bluehost cPanel hosting. Here the have a built password generator to make strong passwords and complex passwords.

So choose the Password trickly by using the Case sensitive letters, special characters and numbers within your Password by following the Bluehost password rules. But it should not be a complex password.
After creating a new secured and strong password for your Bluehost Cpanel hosting, you can log in into Bluehost account by using the configured login details. You can store these login credentials in a notebook safely.
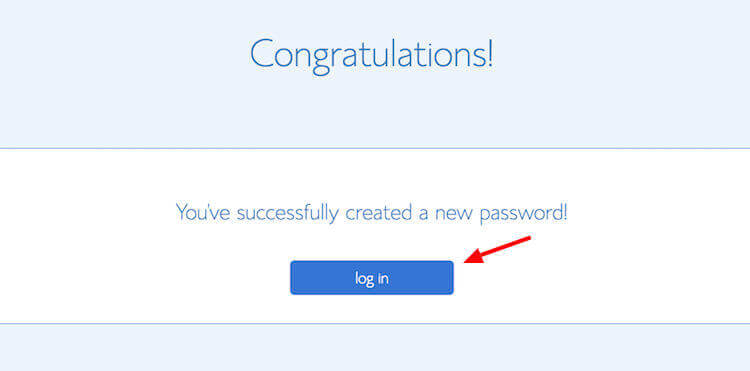
The Bluehost Cpanel dashboard interface is excellent and easy to use, even for newbies. Now the Bluehost setup process is completed.
Let us go to the next section to know how to install WordPress on Bluehost.
How to install WordPress on Bluehost Servers?
Once you finish your purchase hosting plan, the next step is to install WordPress on Bluehost. The process is straightforward with Bluehost’s newly upgraded user-friendly interface with its 1-click WordPress installation feature.
Let us start the WordPress installation steps.
Step 1: Log in to Bluehost hosting
First, you need to log in to the Bluehost Cpanel dashboard, go to My sites > Create Site from the right side of the screen. The Bluehost control panel interface is clean and easy to use. On the screen, it will ask for the site title and tagline.

Step 2: Add Website information
Now you have to enter the basic information like Site name or Site Title and Site Tagline. You can change the site title section later if you need any changes.

Step 3: Choose your Domain name
Choose the domain name from the drop-down section from this page on which you wish to install WordPress software, which is entered at the time of Bluehost account creation.

Bluehost will suggest a few essential and helpful plugins to install for your blog. You can check it to install it along with WordPress core files. Leave it if not needed.
Finally, start WordPress installation after clicking on the Next button.
Step 4: Start WordPress installation
After hitting the Next button, Bluehost start installing WordPress automatically. After a few seconds, Bluehost finishes the WordPress installation by displaying the WordPress login details. once finished, you will see the success message with a link to your WordPress admin area link. It comes with a username and password with a newly created database. No need to create separately as the old method. Note the WordPress login details in a notebook separately.

You can log in to your new WordPress site by using the Login to WordPress link for the first time. The installer will show you the WordPress overview.
From the next time you have to login into the WordPress specified URL like this. Here you have to enter the site details as Email/username and password in the specified fields.
YourdomainName .com/wp-login.php
How to set up a WordPress site with Bluehost’s tools?
After finishing the above steps, you can do the wordpress standard basic settings after the new installation. If you are confused about where to start, you will find the Bluehost area after logging into the WordPress dashboard.
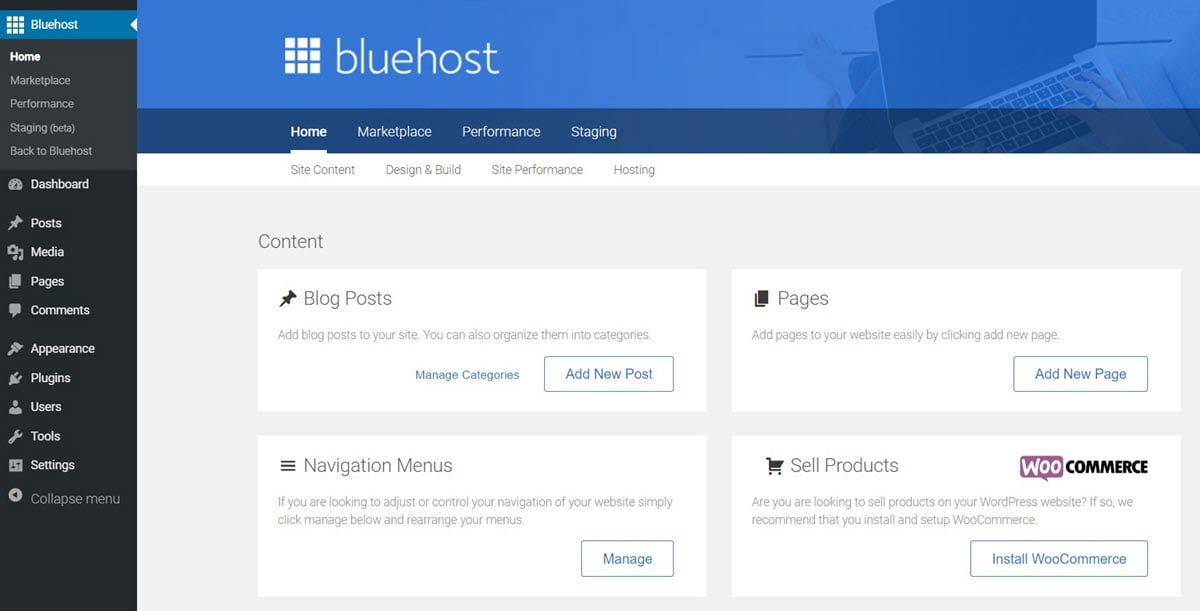
You will find the following sections in the Bluehost tools area.
- Blog posts: The area to write new articles with well-researched topics and images.
- Pages: The place to create all necessary pages within your site like contact us, About us, Terms of services, Privacy policy and Disclaimer, etc.
- Navigation Menu: TheWordPress menu is the place to create a menu for easy content navigation.
- Sell Products: You can create an ecommerce store by using the WooCommerce wordpress plugin to move your business grow online. Wocommerce is one of the best and top rated ecommerce plugins.
- Staging environment: It helps you to test your website condition like design.
The Bluehost dashboard is the place to start the new site’s basic setup and gives perfect guidelines for getting started. Start learning WordPress interface details step by step to understand WordPress platform power.
Step 1: Start using Quick Launch Wizard.
After logging into the WordPress dashboard, you will find the Bluehost Quick Launch Wizard tool. It is the advanced WordPress installation wizard, which helps you to start the site in a new way. You can follow the wizard guidelines to configure the necessary plugins and themes for your fresh start. QuickInstall is another popular auto-installer used by many hosting companies like HostGator and others. Hosting companies like SiteGround and InMotion Hosting use Softaculous in their control panel.
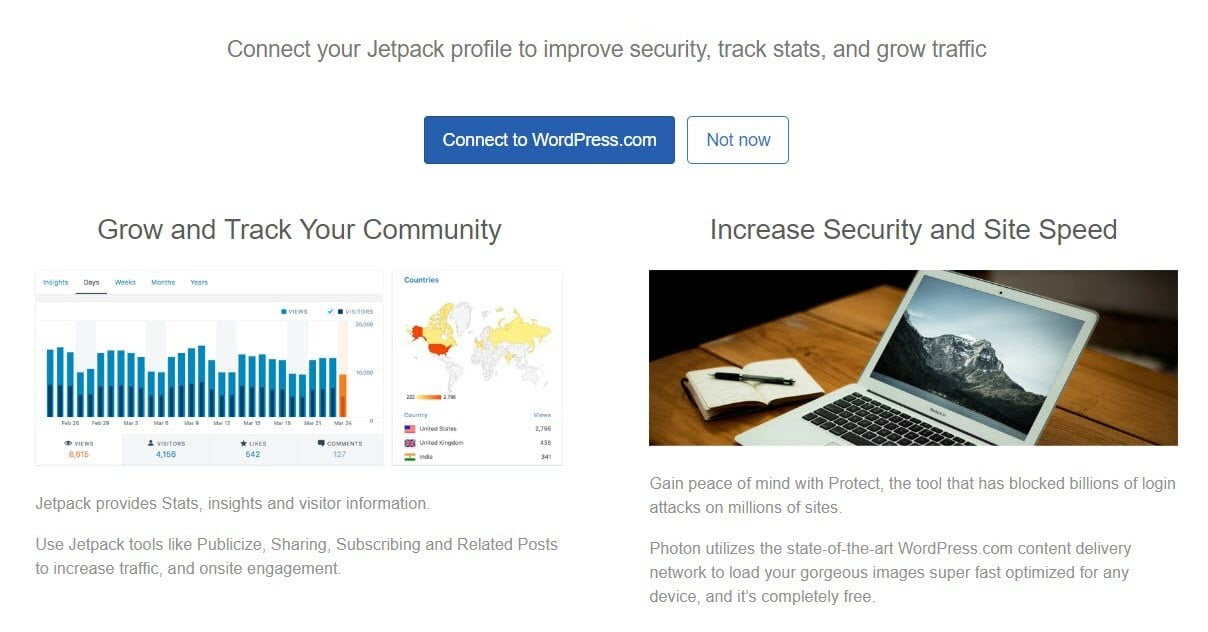
Different hosting companies use different auto-installer scripts. The Bluehost is using the quick launch wizard tool is the amazing feeling to get your website started in a couple of minutes. It guides you through configuring the essential plugins like Jetpack, WP Forms Lite and Caching.
- Jetpack:
- Jetpack is the powerpack plugin developed by WordPress developers.
- It helps you to secure your site for better performance.
- It has social sharing features like auto-posting to social networks.
- The Jetpack’s site stats is another improved site analytics area to know the best performance post and more.
- To use this plugin, you need to authorize it with a WordPress.com account.
- WPForms Lite:
- Every serious site should have a contact form to enable your blog visitors to connect with you.
- It helps you to create a contact form for your site.
- It increases leads generation.
- It is a simple and easy to use a wordpress plugin to create simple forms.
- Caching:
- Bluehost comes with a built-in caching system to make your website load faster.
- After activating this feature, the site will load faster for better user experience and search engine ranking per SEO.
Step 2: Choose a suitable WordPress theme
In the second section of the Bluehost dashboard wizard, the name is Marketplace. It has premium WordPress themes. You can browse the themes and install them according to your website requirements. The Bluehost team has taken extra steps to collect the high-quality WordPress themes to place in the marketplace for their user access.
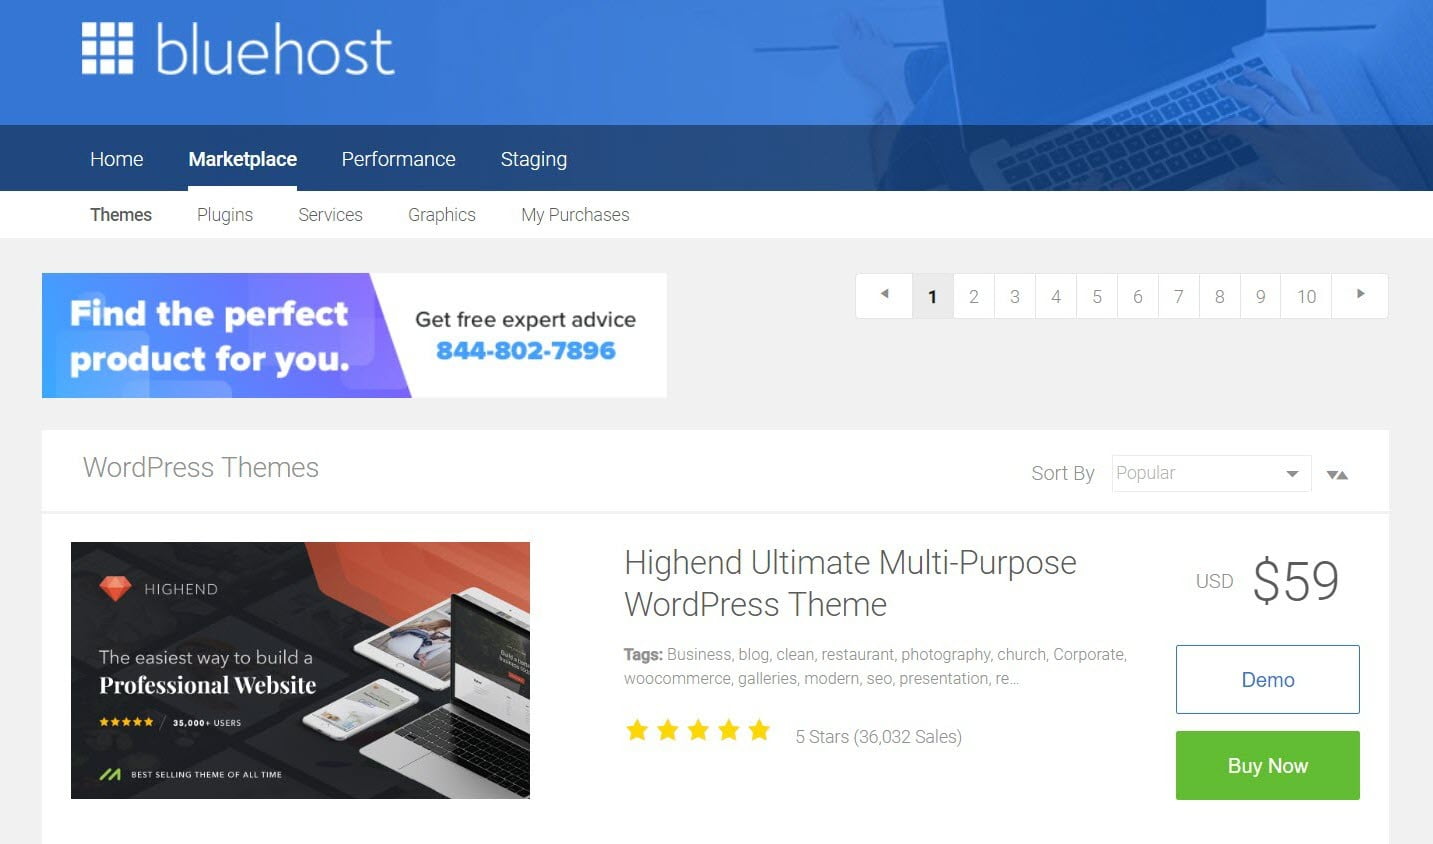
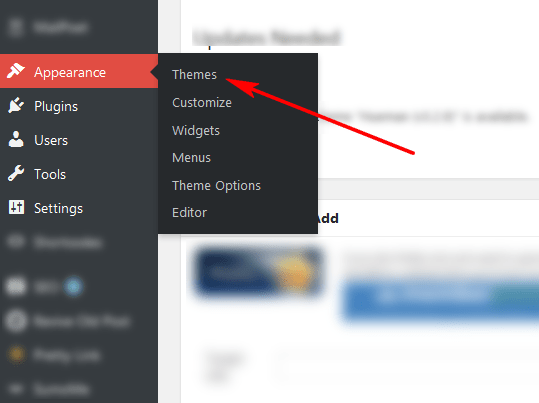
If you are on a limited budget, you can install a theme from the default WordPress themes directory at Appearance > Themes section. You will get thousands of free WordPress themes to start the installation. But in the case of Free WordPress themes, there are more restrictions to customize your site. If you go for the premium themes, there are no limitations.
There are plenty of best places to buy WordPress premium themes on the web like ThemeForest, Elegant Themes, StudioPress, Mythemeshop, and GeneratePress.
I am using the GeneratePress theme in all my blogs, a fast loading WordPress theme with lightweight. You can grab this theme from this magic link.
Step 3: Install essential WordPress plugins.
By default, the Bluehost installs minimal plugins while WordPress installation. It may be Akismet, MonsterInsights, Jetpack and WPForms lite plugins. But if you do not want to use it, you can delete any of the default plugins.
For every new WordPress site, there are more than ten must have WordPress plugins to start your blogging journey cool.

To install plugins, go for Plugins > Add new and search for the plugin name within the plugin search box. You will get tons of plugins with the same functionality. Please choose the best-rated plugin, install and activate it. You can manage WordPress plugins all from one place from the WordPress dashboard.
Some of the essential plugins to install
- Yoast SEO (or) Rank Math SEO – To prepare your site and content SEO friendly
- Elementor – to design attractive landing pages
- Wordfence Security – to protect your site from hacking and spamming
- UpdraftPlus – To backup your data to cloud storage like Google Drive
- WP Rocket (Premium plugin) – to make a site easy to load
- Thirsty affiliates – to shorten affiliate links as easy to readable
- Advanced ads – to place the ads at various locations within your site.
Step 4: Create primary pages
It is the final step to finishing the WordPress setup, which is ready to launch the WordPress website. First, start creating content for your website by adding content in the major pages Before start posting content, you have to create some essential pages. They are

- HOME PAGE: This is the first page to land your visitor when they visit your URL. You have to design this page with suitable images and content, which helps you capture your visitor’s attention.
- About Page: I created this page to share your story and introduce your team and business motto information. It helps you to build a good relationship with your visitors.
- Contact Page: Create this page to show your business timings, location and social links.
- Portfolio: Create this page to showcase your work.
- Blog: This is a must-have page to keep your visitors with the help of SEO.
To create these recommended pages, go for Pages > New from the left column.
Start 5: Launch your website
Once you complete the content creation, adding content to the site, and site customization, you can launch the Bluehost WordPress dashboard.
The Bluehost activates the “Coming soon page” by default once the WordPress installation is completed. When your site is ready to launch, simply click the button Launch your site from the Bluehost WordPress dashboard.

Once your WordPress starts running, you can start your blogging journey by posting content in the new post section regularly.
FAQs on Starting a blog on Bluehost
Does Bluehost automatically install WordPress?
Yes, In old times, everyone was installing WordPress manually. But now, Bluehost upgraded its servers with advanced technology. It is automatically installing WordPress and setting up the website for their new customers who purchase their web hosting plans.
Is Bluehost good for WordPress?
Yes, Bluehost is the most beginner-friendly web hosting company for WordPress lovers on the market. They will install WordPress and set up the site when you sign up for the new account with a proper web hosting plan.
What are Bluehost SEO tools?
Bluehost SEO tools are the essential starter packs. The tools help your site get listed higher on search engines and reach potential customers with search engine optimization and marketing services.
How do I install WordPress on Bluehost?
The updated, user-friendly Bluehost dashboard makes your WordPress installation task easy. The Bluerock cpanel helps you to install WordPress within a few clicks. After logging into the Bluehost account, go for the My Sites > Create site. Then enter the site name and site tagline. Finally, choose the domain name and select the recommended plugins and go. After a few seconds, you will get the installation details on your screen. Now your site is ready.
Why Is Bluehost Good for blogging?
Because of its security features, Bluehost is good for blogging. The Bluehost servers are optimized for better speed and provide exclusive features helpful to new bloggers at the lowest prices, starting at $2.95 per month. It comes with 24/7 live chat and free SSL certificate features included for the first year. Bloggers and Small businesses can create their blog immediately with these Bluehost excellent features without a second thought. Bluehost is an officially recommended WordPress hosting provider and one of the largest hosting companies in the world.
Which Bluehost plan is best for bloggers?
Bluehost’s choice plus plan is perfect for bloggers. It comes with all essential features offered by Bluehost at affordable prices like Free SSL, CDN, code guard, free domain, domain privacy and many more. The cost of the choice plus is the same as Bluehost’s Plus plan. Pick the higher plan for 36 months for the Bluehost discounted prices to overcome yearly renewal charges up to three years.
Does Bluehost pay monthly?
The Bluehost does not offer a monthly payment option on their cheap and reliable shared WordPress hosting and managed WordPress hosting plans. If you need month-to-month billing with Bluehost, go for VPS or dedicated hosting plans.
Does Bluehost offer a free domain?
Yes. all the Bluehost shared hosting plans come with one free domain name for the first year to save more than $12.
Does Bluehost offer a refund policy?
Bluehost comes with a 30 days money-back guarantee. If you are not satisfied with this hosting server, you can submit a request to get your money back. But if you claim the free domain with your plan, the domain will be charged $12. The remaining money will come back to your account.
Final words on How to install WordPress on Bluehost
This guide will help you with the WordPress installation process in a step-by-step manner. Bluehost is the tenth-largest web hosting provider in the world, with thousands of customers joining every day. The hosting is reliable, secure, and has a good customer support team. The live chat team is very fast and responsive. The Bluehost WordPress tutorial is beneficial to get the WordPress blogging platform to start your blog for your business.
When comparing the Bluehost prices with other hosting costs, these are very good and provide more features than any other hostings. Bluehost incorporates a range of tools and functions with your site and allows you to access most of the features from the Bluehost WordPress dashboard, which helps you to streamline your site creation in a fast mode.
This article explains the complete guide on creating a WordPress site on Bluehost. you can refer for more details.
If you are having any problems with installation, do not hesitate and feel free to use the comment box below to drop your queries. I will help you to solve the problem.
If this tutorial is helpful, please share this with your friends through social media by using the Social icons. Happy Blogging.

Ready to Get Started?
Start your dream website a reality with Bluehost. It doesn’t take long.
Push this to Start Now


No doubt that one-click installation is the easiest way to install WordPress. You have shared really nice tutorial for beginners and it’ll surely help them. Thanks for sharing.
Hello Satish, This is Sufyan.
Simple and useful tutorial on WordPress installation on Bluehost.
Thank u for the tutorial.
This is really good tip and precise steps. I’ll give this a try and see how well it works. twas good you shared this.
I have just got bluehost hosting few days back. I installed wordpress manually. Btw great tutorial i never thought install wordpress would be so simple.
Welcome to Shreya,
Glad to hear that you found it useful. Keep visiting for more awesome articles.
Wow, this is exactly what I was looking for.
Thank you for making it clear enough to understand and follow.
Awesome, post.
– Nestor
Thank you Atish.
This is so easy that anyone can do in few clicks. Nice tutorial Satish.